
How to Configure LycheeIP Proxy IP in HubStudio Browser
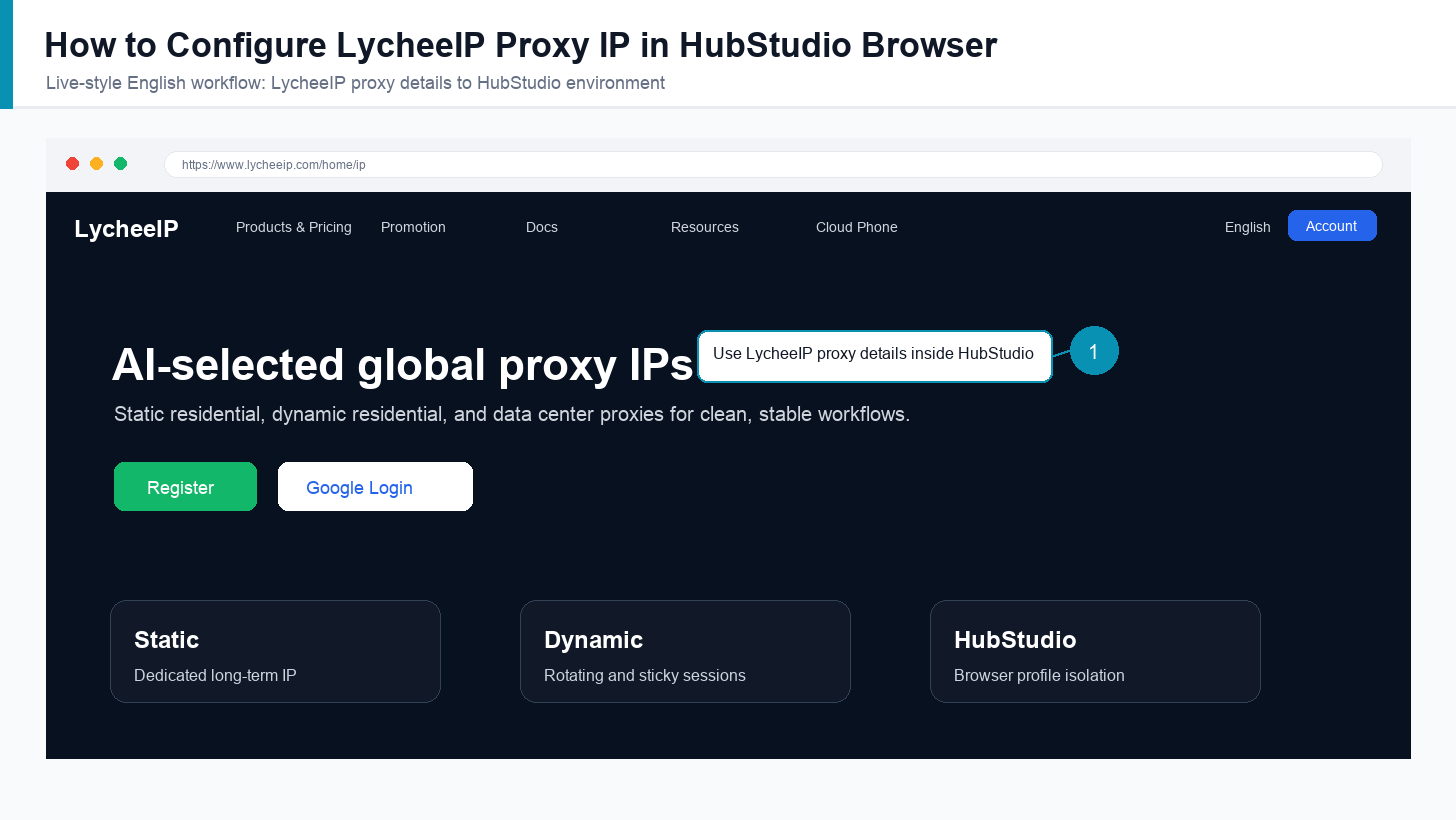
Configure LycheeIP residential proxy IPs in HubStudio Browser by preparing a cross-border network environment, copying the correct proxy details, creating a HubStudio environment, testing the proxy, and launching the browser profile.
LycheeIP proxy products need to be used from an overseas network environment. This workflow assumes the base network environment is already available before adding the LycheeIP proxy inside HubStudio.
HubStudio Browser registration page: https://www.hubstudio.cn/register/index.html?ref=lycheeip. The source tutorial notes that new registrations may receive daily free environment usage.
How to Configure LycheeIP Static Proxy IP in HubStudio
Step 1: Extract the Proxy IP from LycheeIP
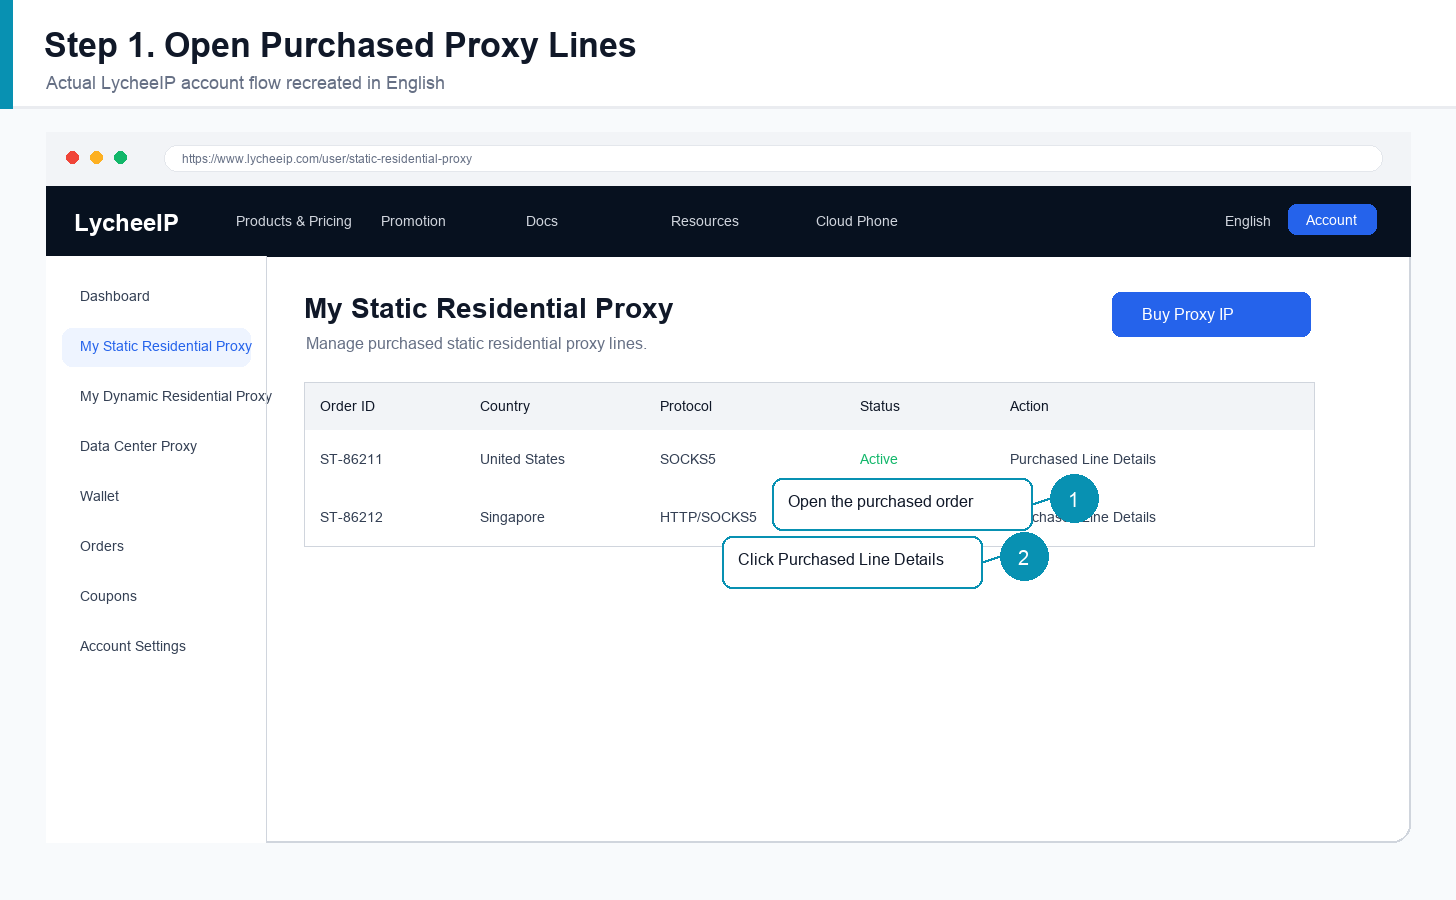
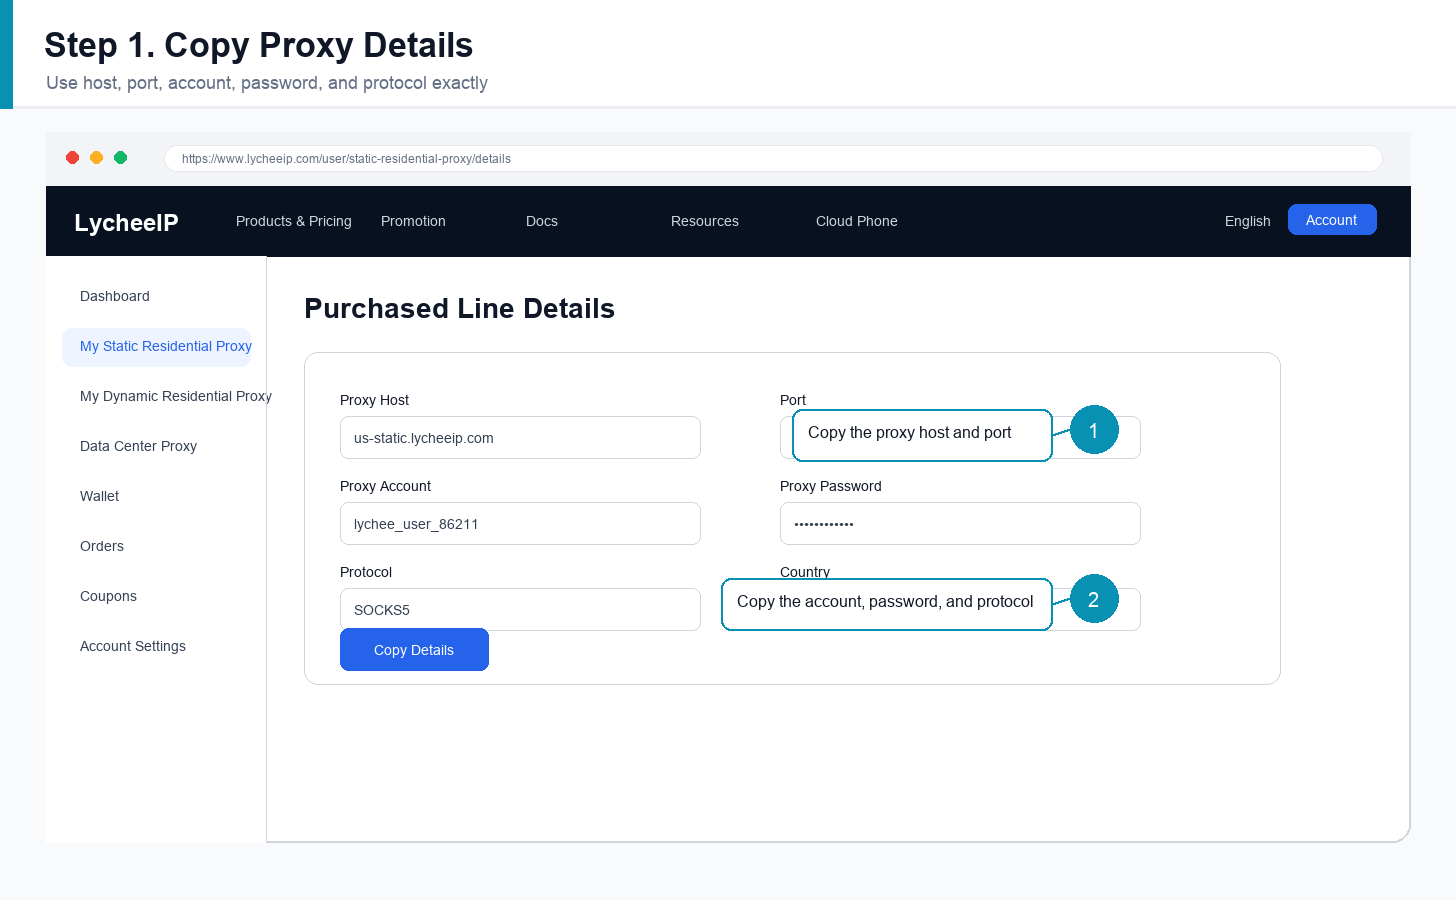
Register or log in to the LycheeIP dashboard, follow the purchase flow, and buy the residential proxy product. After purchase, click the profile avatar in the upper-right corner, open the corresponding purchased proxy, and choose Purchased Line Details. The proxy details appear in the middle information panel.
View LycheeIP Static Residential Proxies
Step 2: Configure the Proxy IP in HubStudio
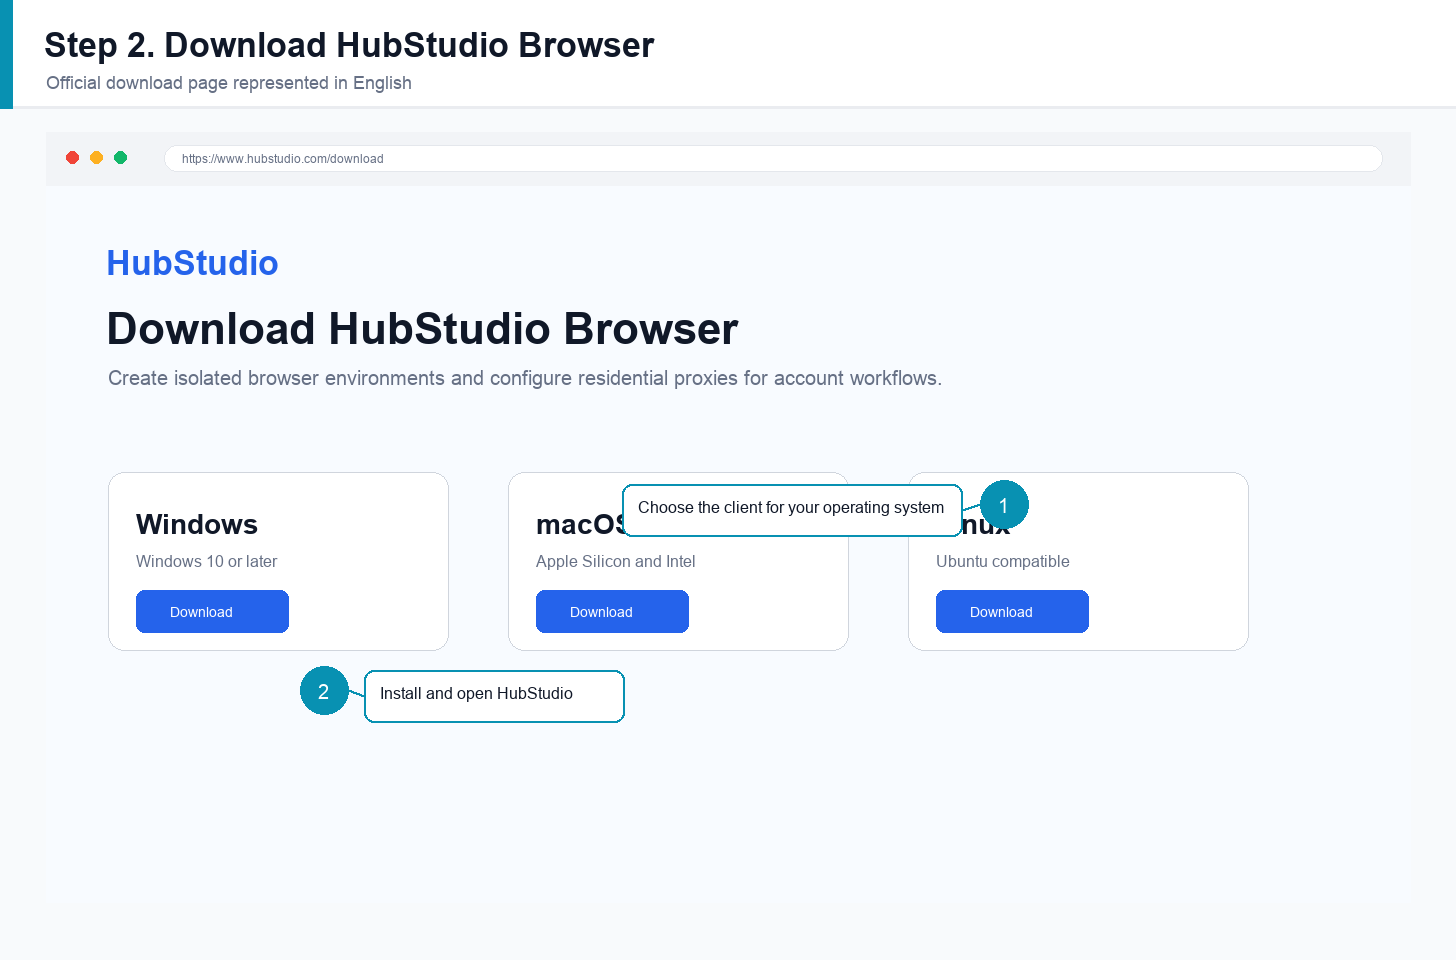
Download HubStudio Browser from the official download page. You can also open the HubStudio download page directly, install the correct client for Windows or macOS, then open HubStudio and register or log in.
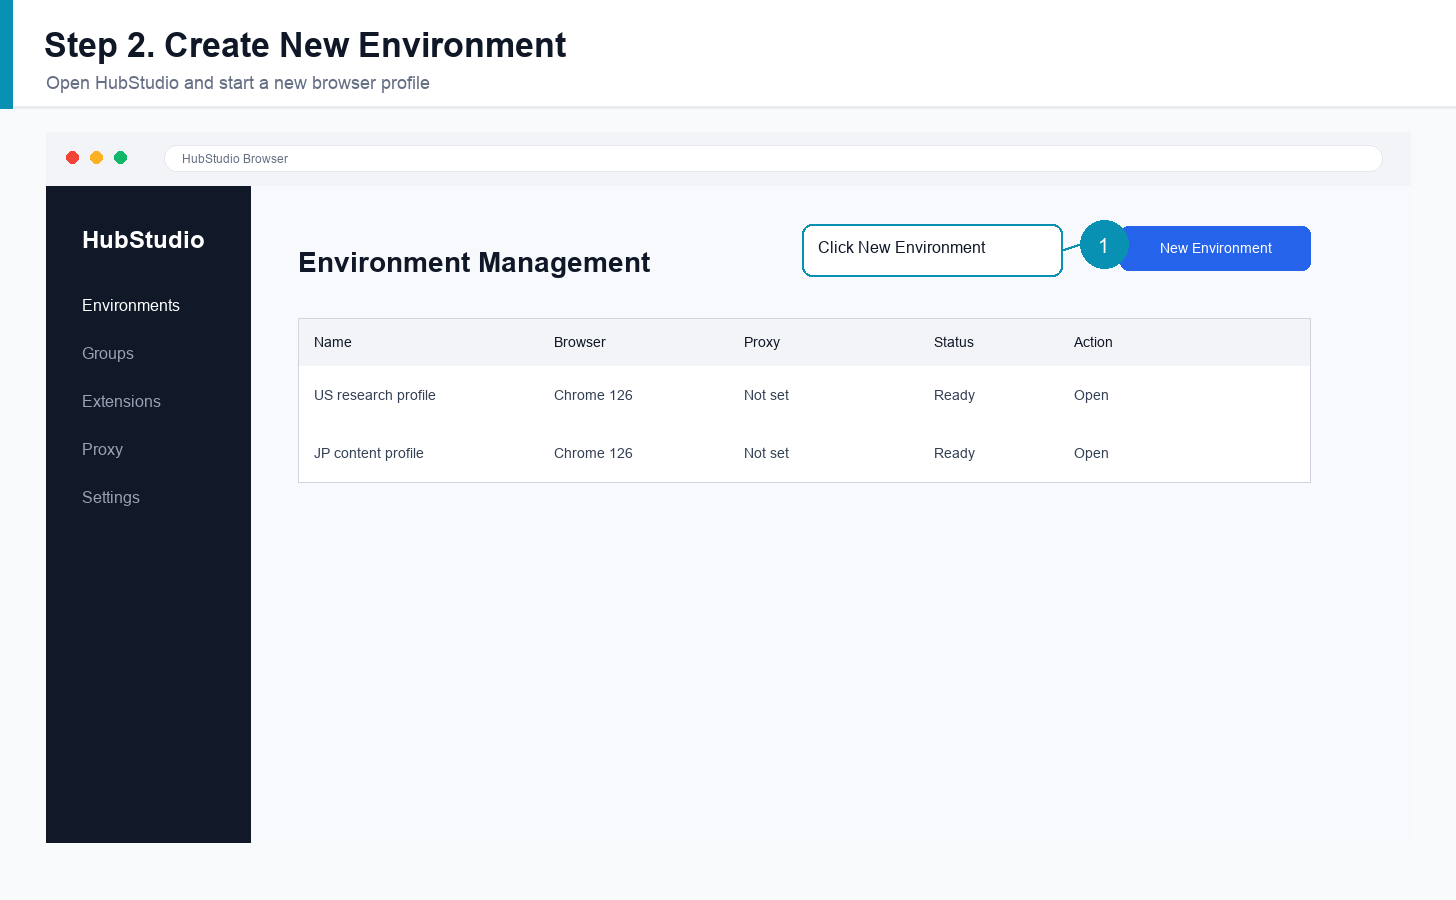
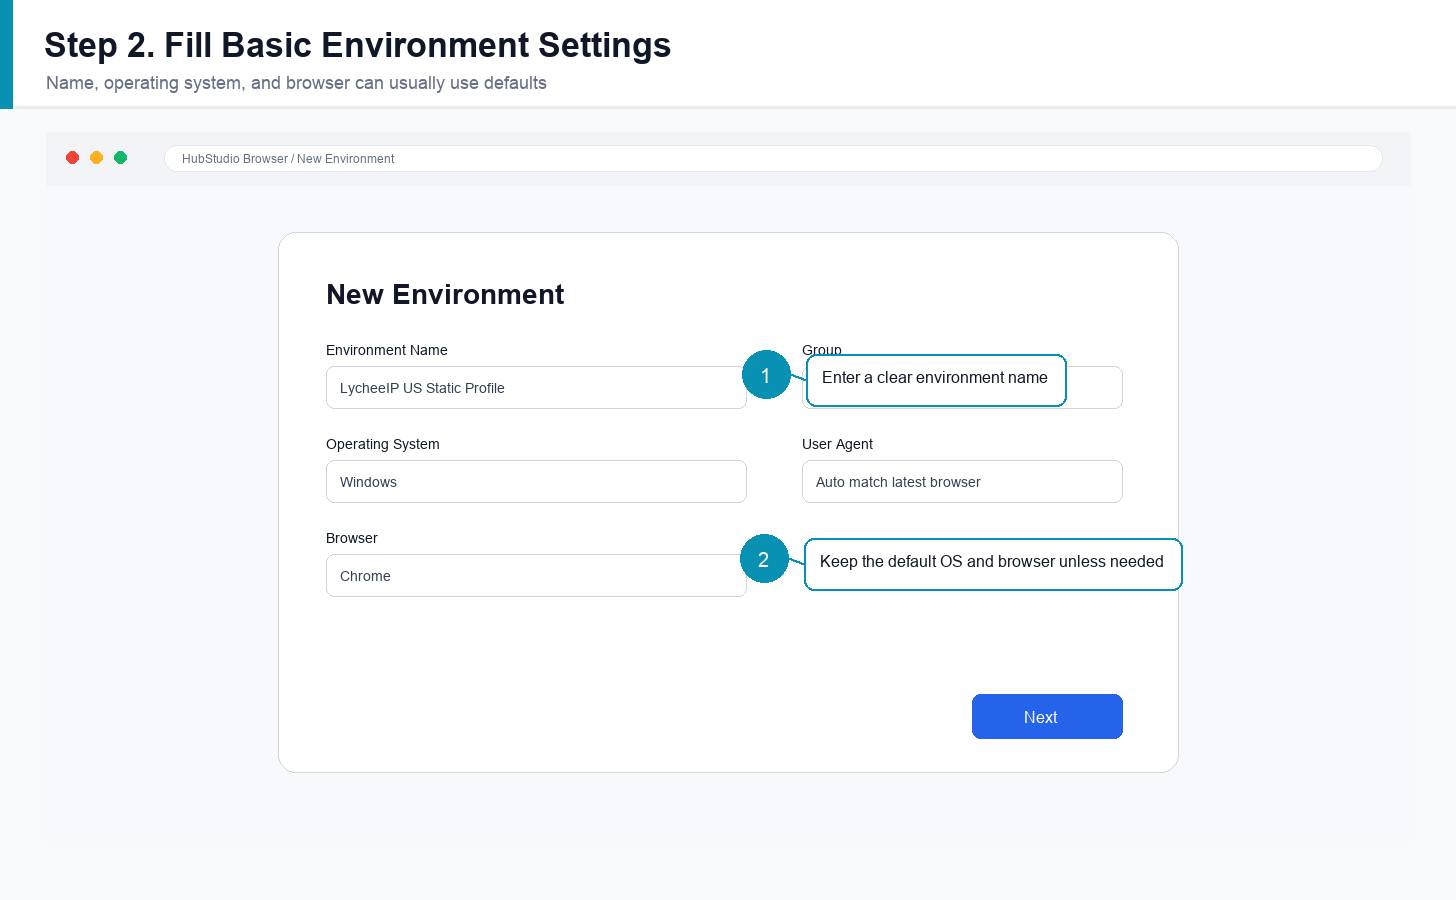
After opening HubStudio, click New Environment. Fill in the environment name, operating system, and browser. In most cases, the default browser option is acceptable.
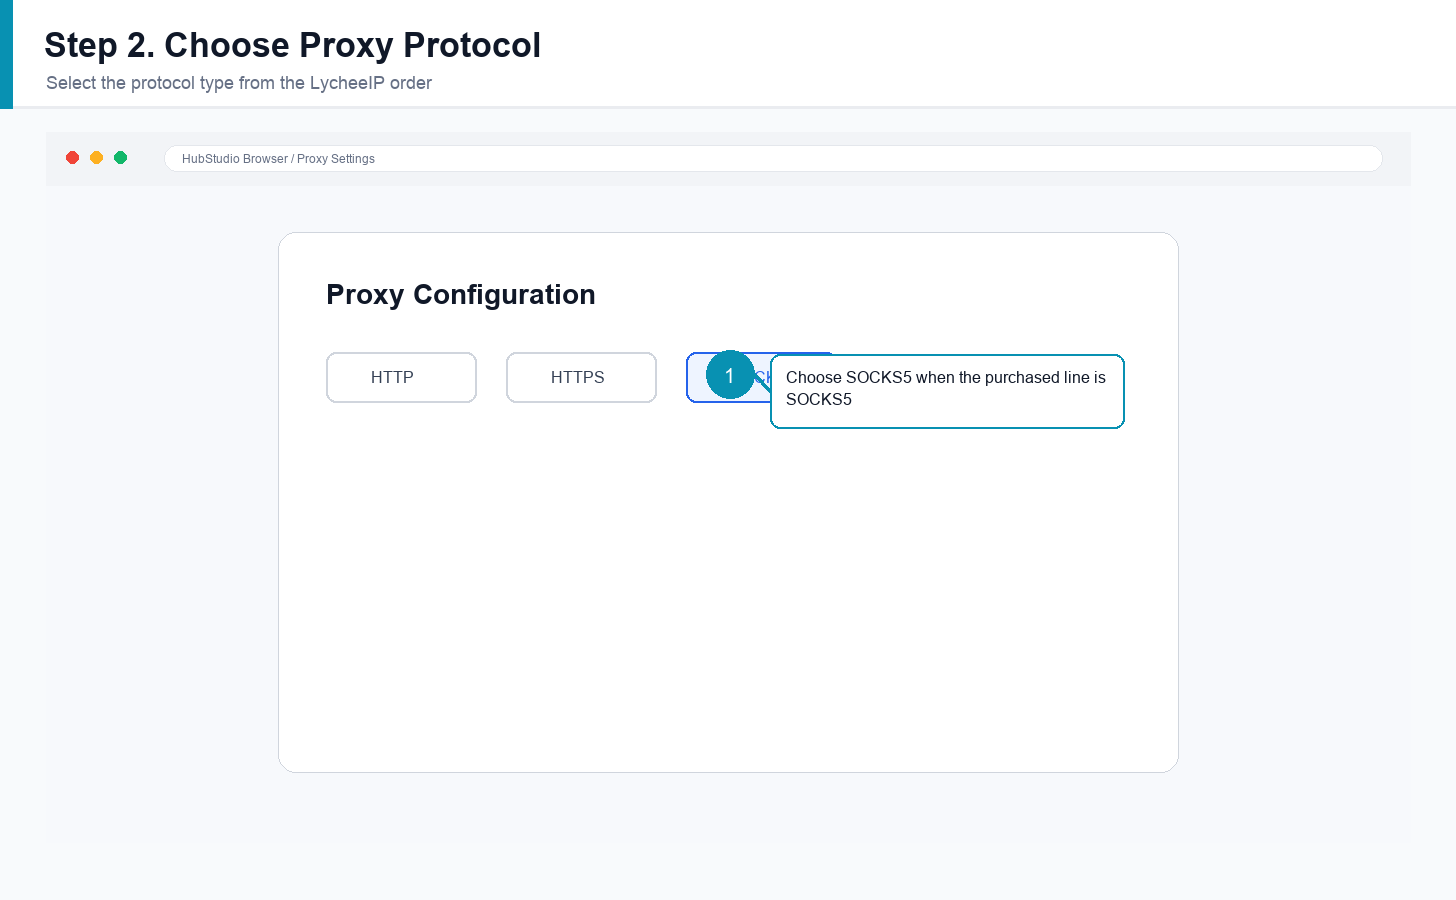
In proxy configuration, choose the protocol type from your LycheeIP order. The source tutorial recommends selecting SOCKS5 when the purchased proxy line is SOCKS5.
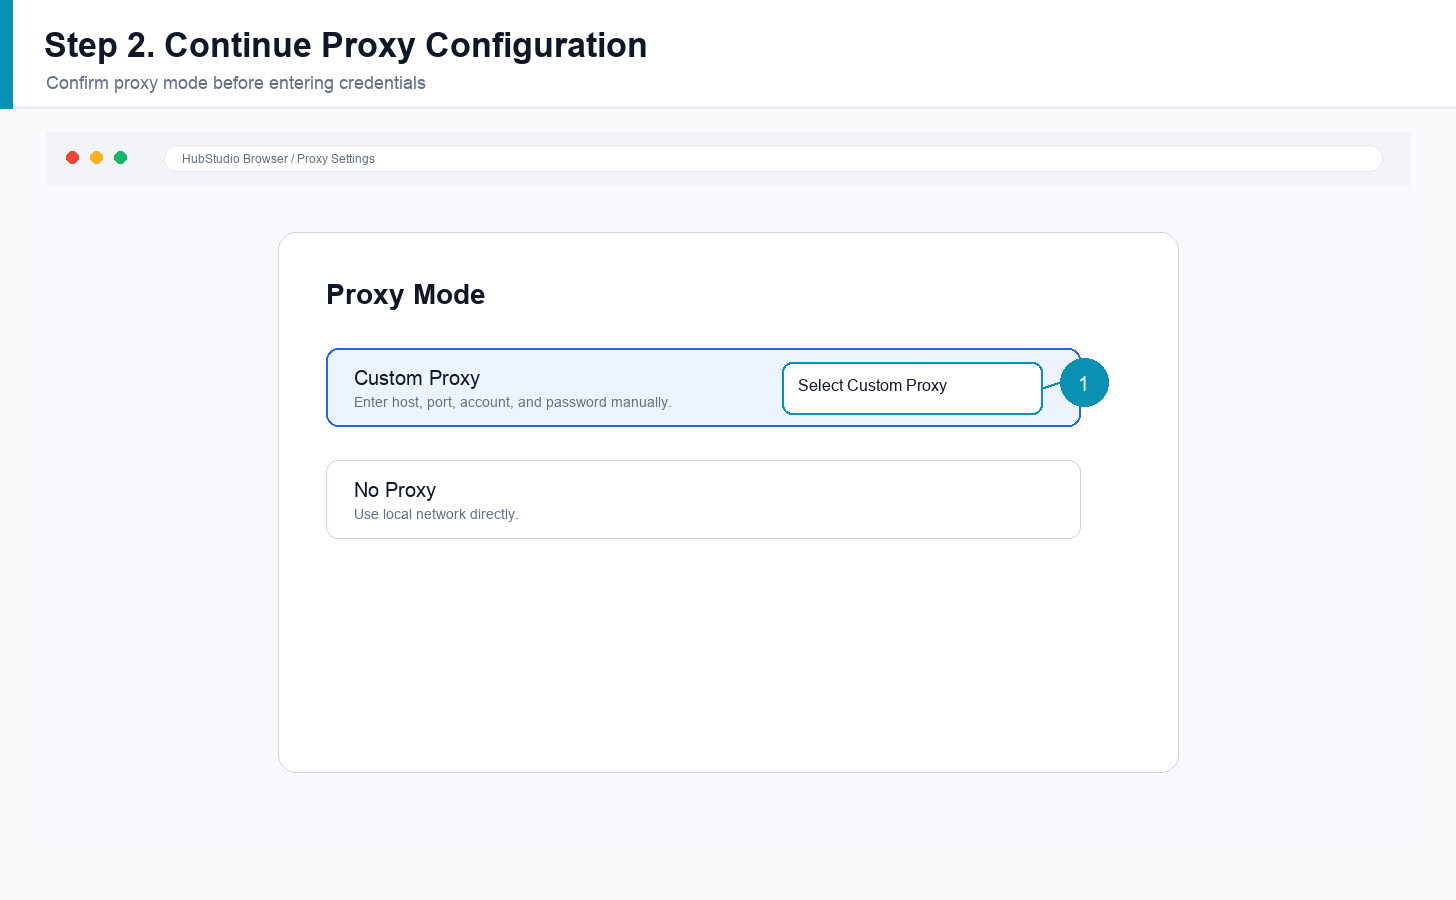
Enter the purchased residential proxy information exactly: proxy server, port, proxy account, and proxy password. Do not add spaces or change punctuation.
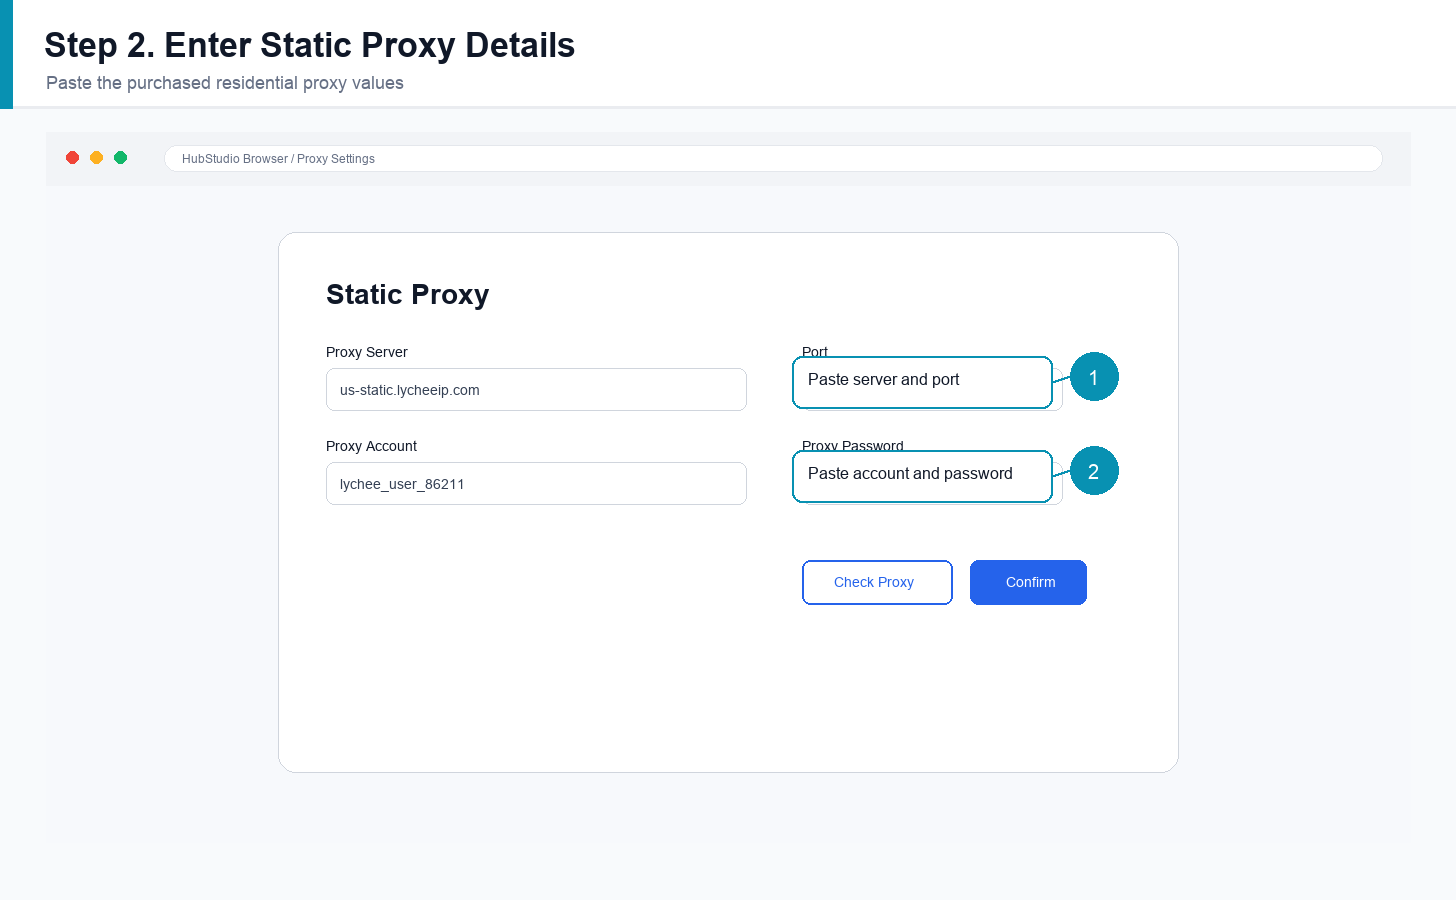
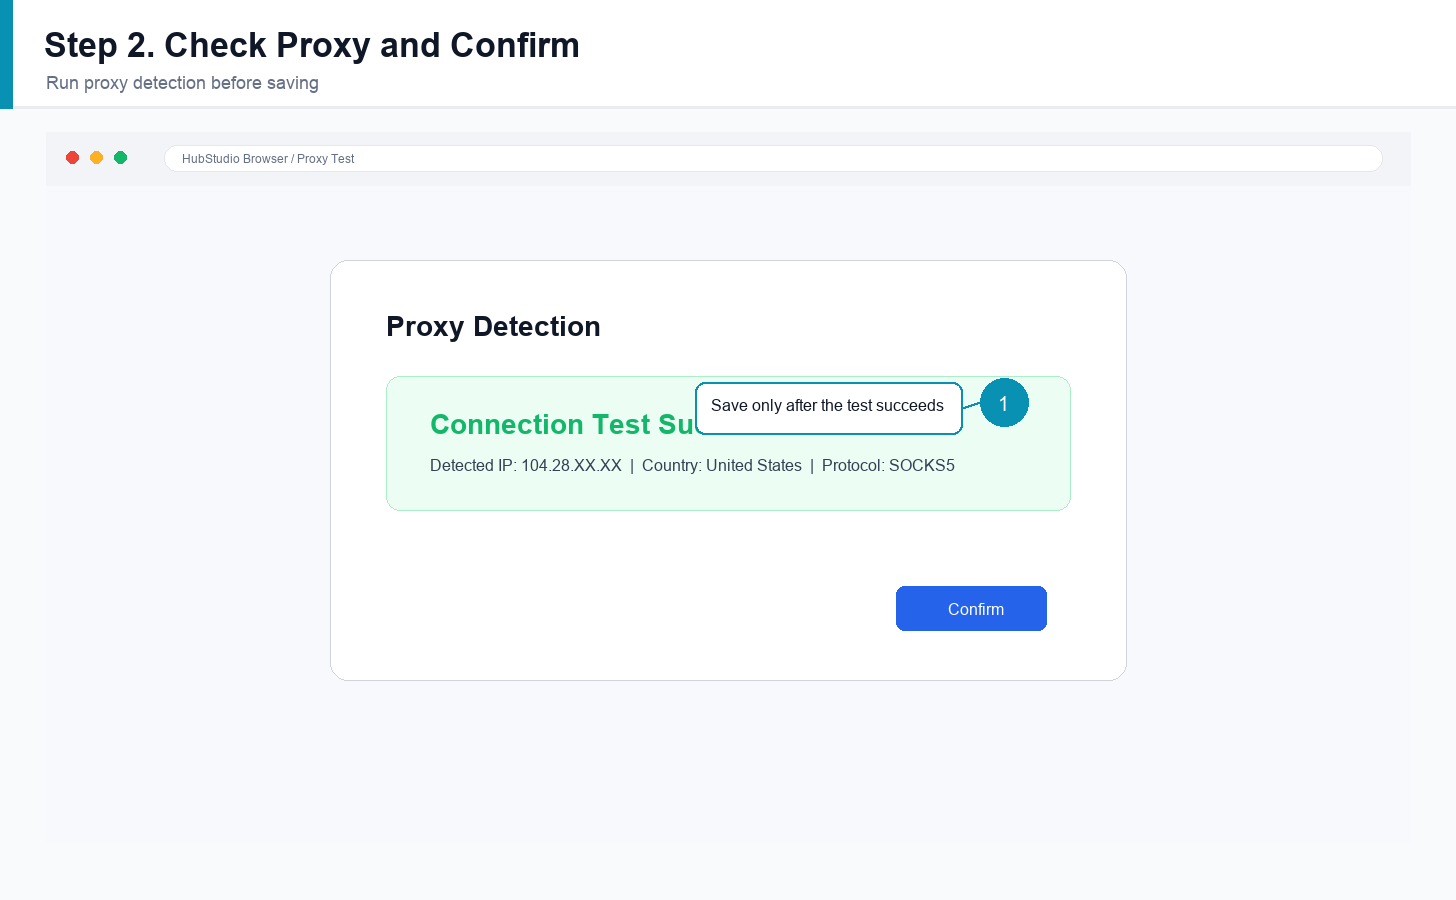
Click Check Proxy. If HubStudio reports that the proxy connection test is successful, click Confirm to save the environment.
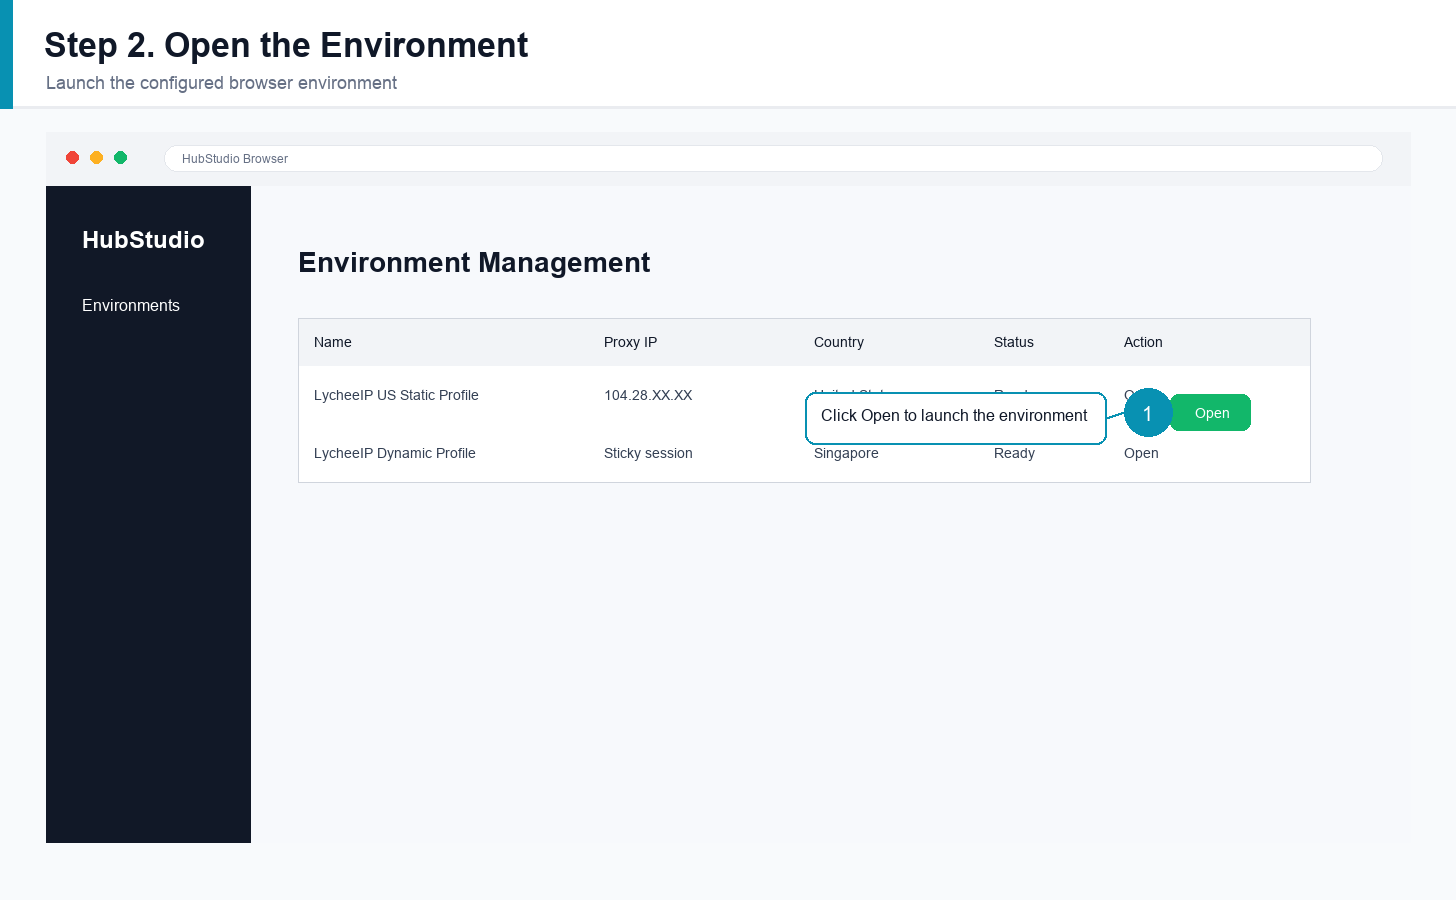
After saving, go to Environment Management. The newly created environment appears in the list. Click Open on the right to start using the configured browser environment.
How to Configure LycheeIP Dynamic Proxy IP in HubStudio
Step 1: Purchase a Dynamic Proxy IP
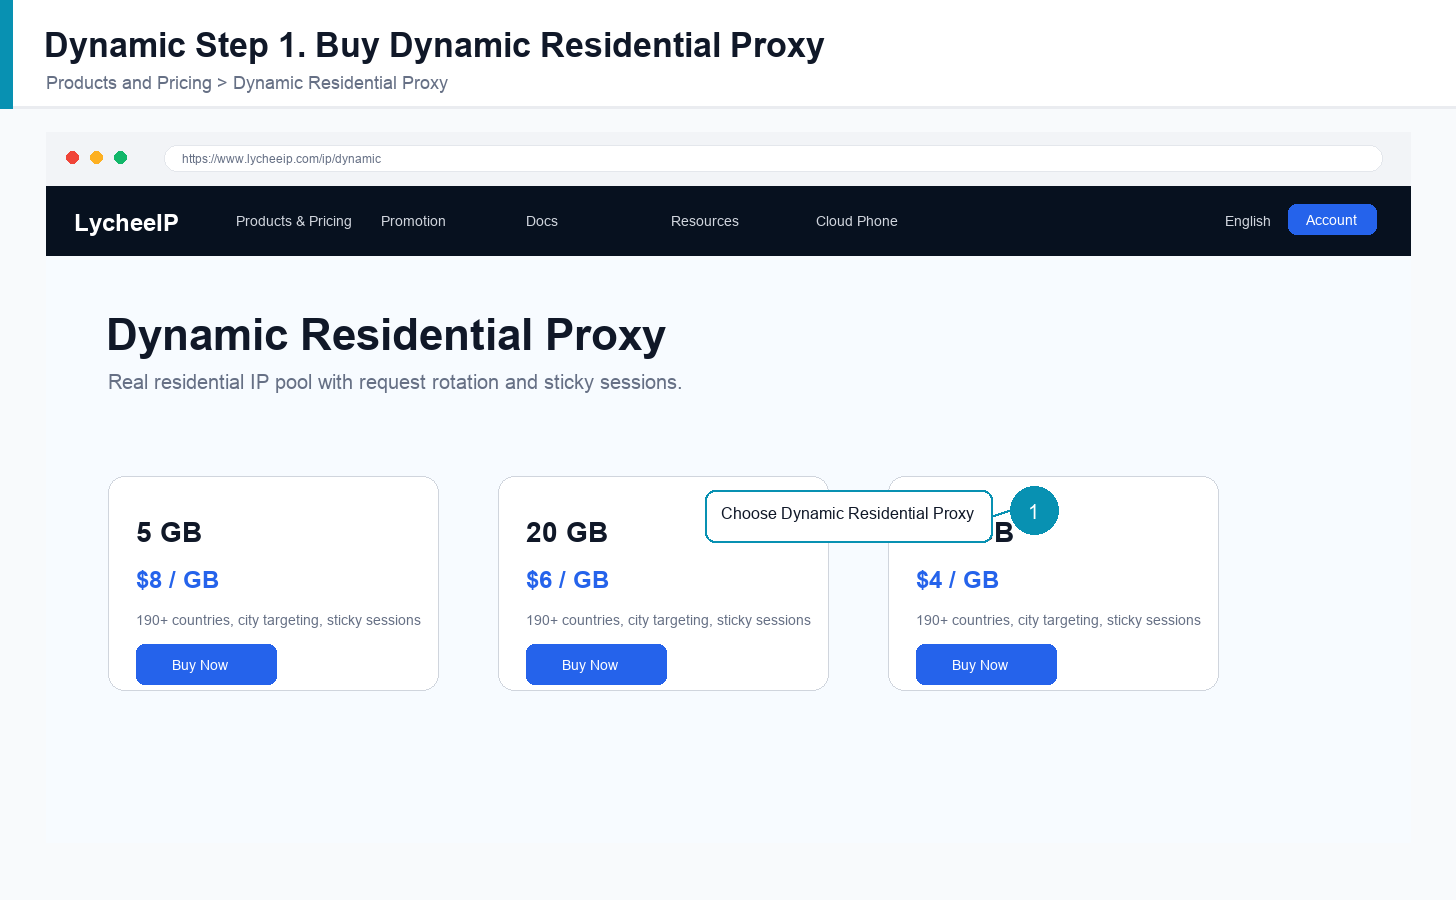
Open Products and Pricing, choose Dynamic Residential Proxy, and purchase the dynamic proxy package that matches your target country, traffic requirements, and session needs.
Step 2: Obtain the Dynamic Proxy IP
Click the profile avatar in the upper-right corner and enter My Dynamic Residential Proxy. Configure the access parameters before generating proxy lines.
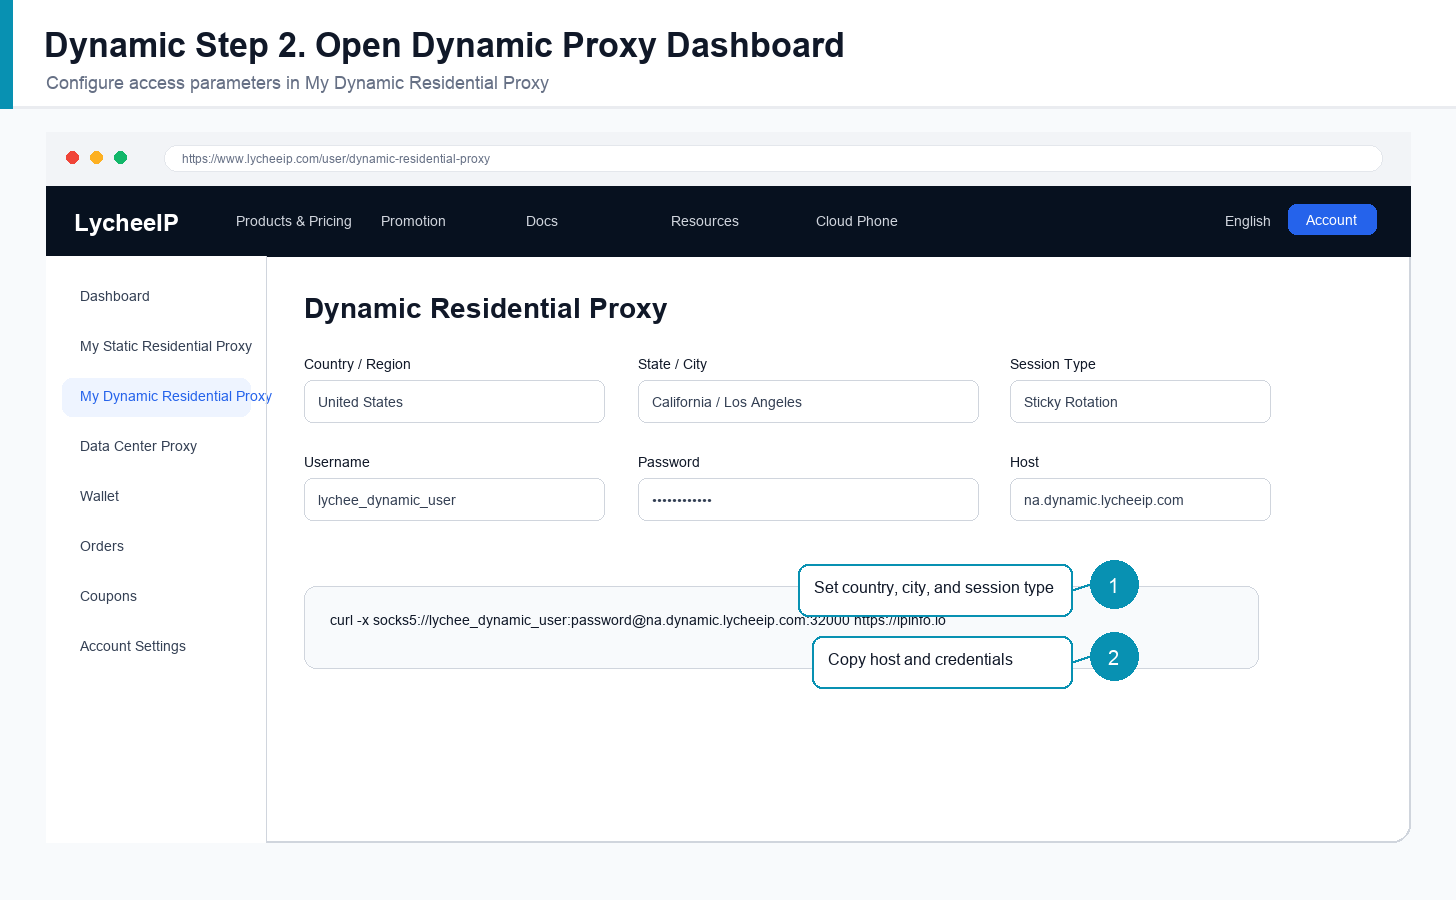
- Choose the proxy source country or region, or use global rotation only when mixed regions are acceptable.
- After choosing a country, select state and city fields when required.
- Review the dynamic proxy username and password because they are the authentication credentials.
- Choose Request Rotation for a new IP on each request, or Sticky Rotation to keep the same IP for 5 to 180 minutes.
- Choose the proxy host closest to the target country, such as a North America host for the United States or an Asia host for Singapore.
- Use the curl test command if you want to validate proxy access before putting it into HubStudio.
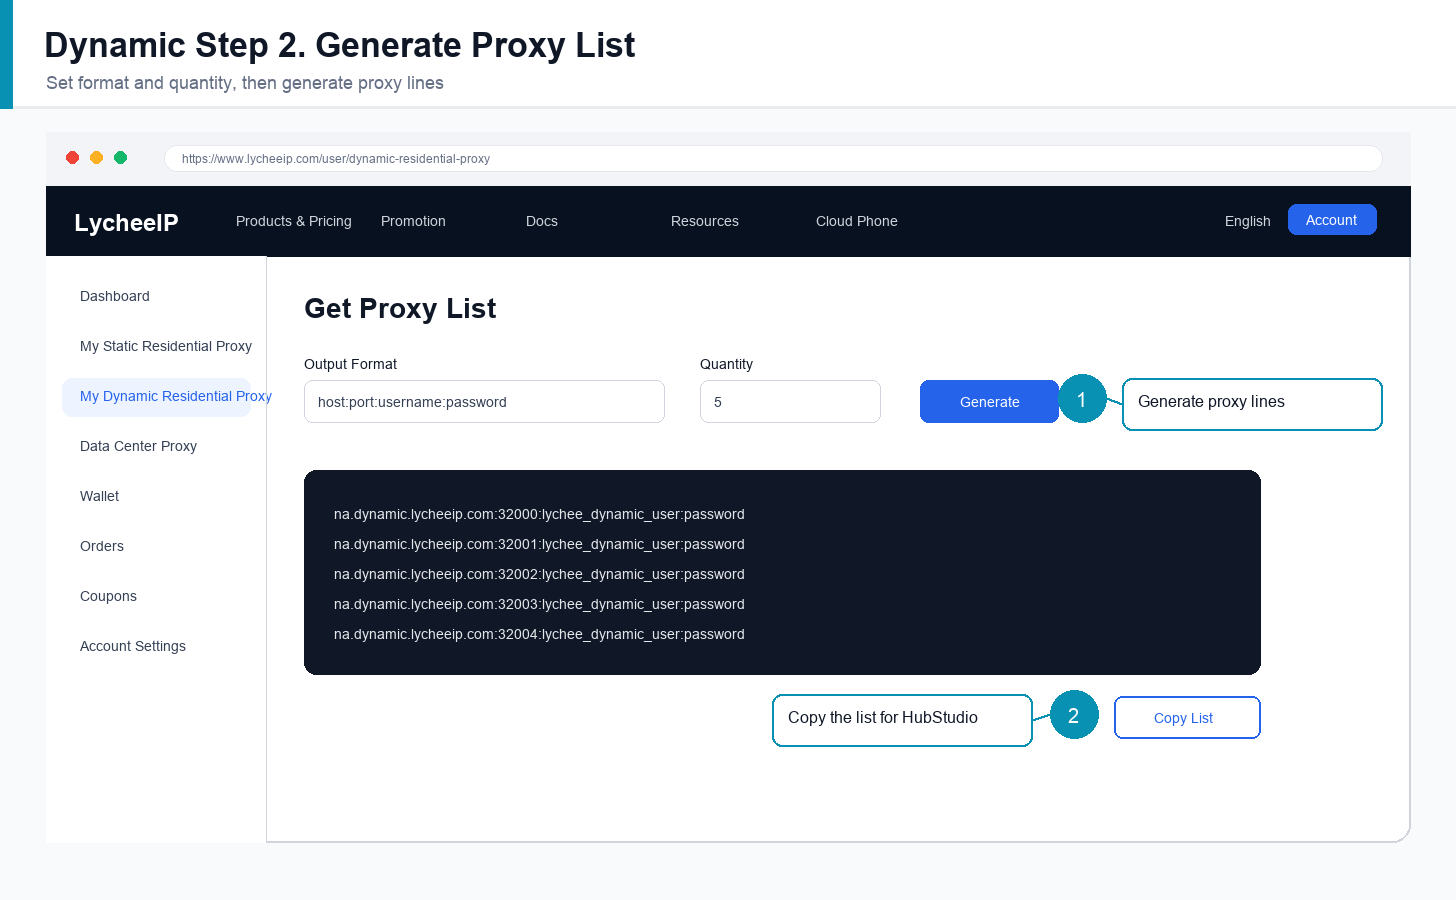
- In Get Proxy List, set the correct output format and quantity, then click Generate.
- Copy the generated proxy list or download it as a TXT file.
Step 3: Configure the Dynamic Proxy IP in HubStudio
In HubStudio, create a new environment, choose the proxy type, and enter the generated proxy server, port, proxy account, and proxy password. Click Proxy Check before saving.
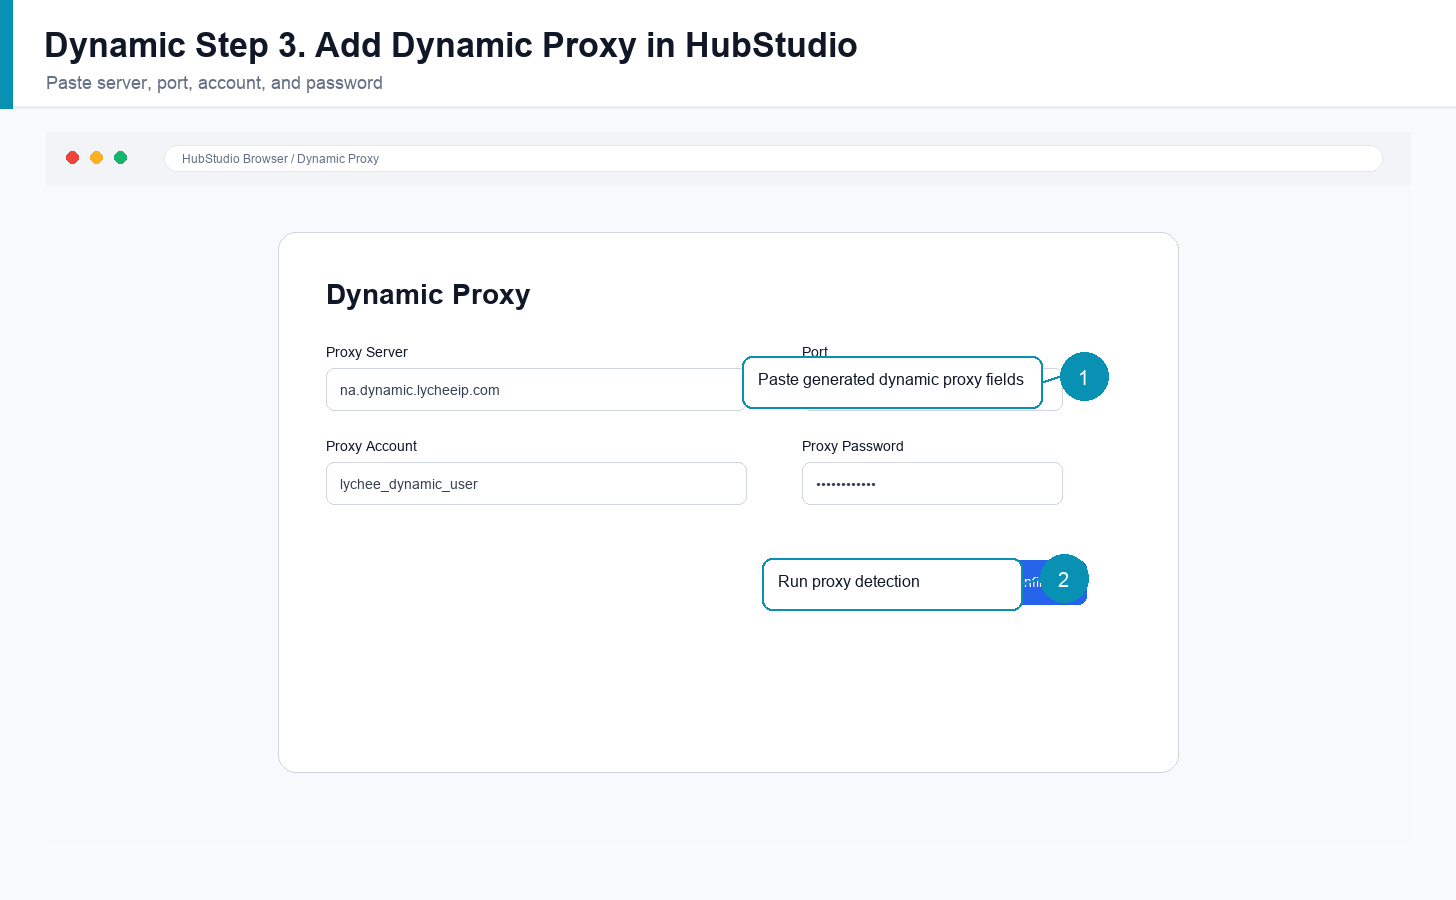
Connection Test Successful means the dynamic proxy information is valid. Open the browser to verify the proxy works normally. Connection Test Failed means HubStudio cannot connect to the proxy service; recheck the generated line or contact LycheeIP support.
Generate Dynamic Residential Proxies
Frequently Asked Questions
Should HubStudio use static or dynamic proxies?
Use static residential proxies when a browser environment needs long-term continuity. Use dynamic residential proxies when generated lines, rotation, or sticky sessions better fit the workflow.
What should I do if proxy detection fails?
Check the protocol, server, port, proxy account, proxy password, base overseas network, and whether the proxy line has expired or rotated.
Can I reuse one proxy across many environments?
Avoid reusing one proxy across unrelated accounts. Important browser environments should have their own stable network identity.
Related LycheeIP Articles
Related LycheeIP articles: residential proxies, anonymous proxy servers, mobile proxies, Apple proxy setup, MoreLogin proxy setup, AdsPower proxy setup, Instagram proxy management, mobile and residential proxy use cases, private proxy guide, public versus private IP guide.

Recommended Articles
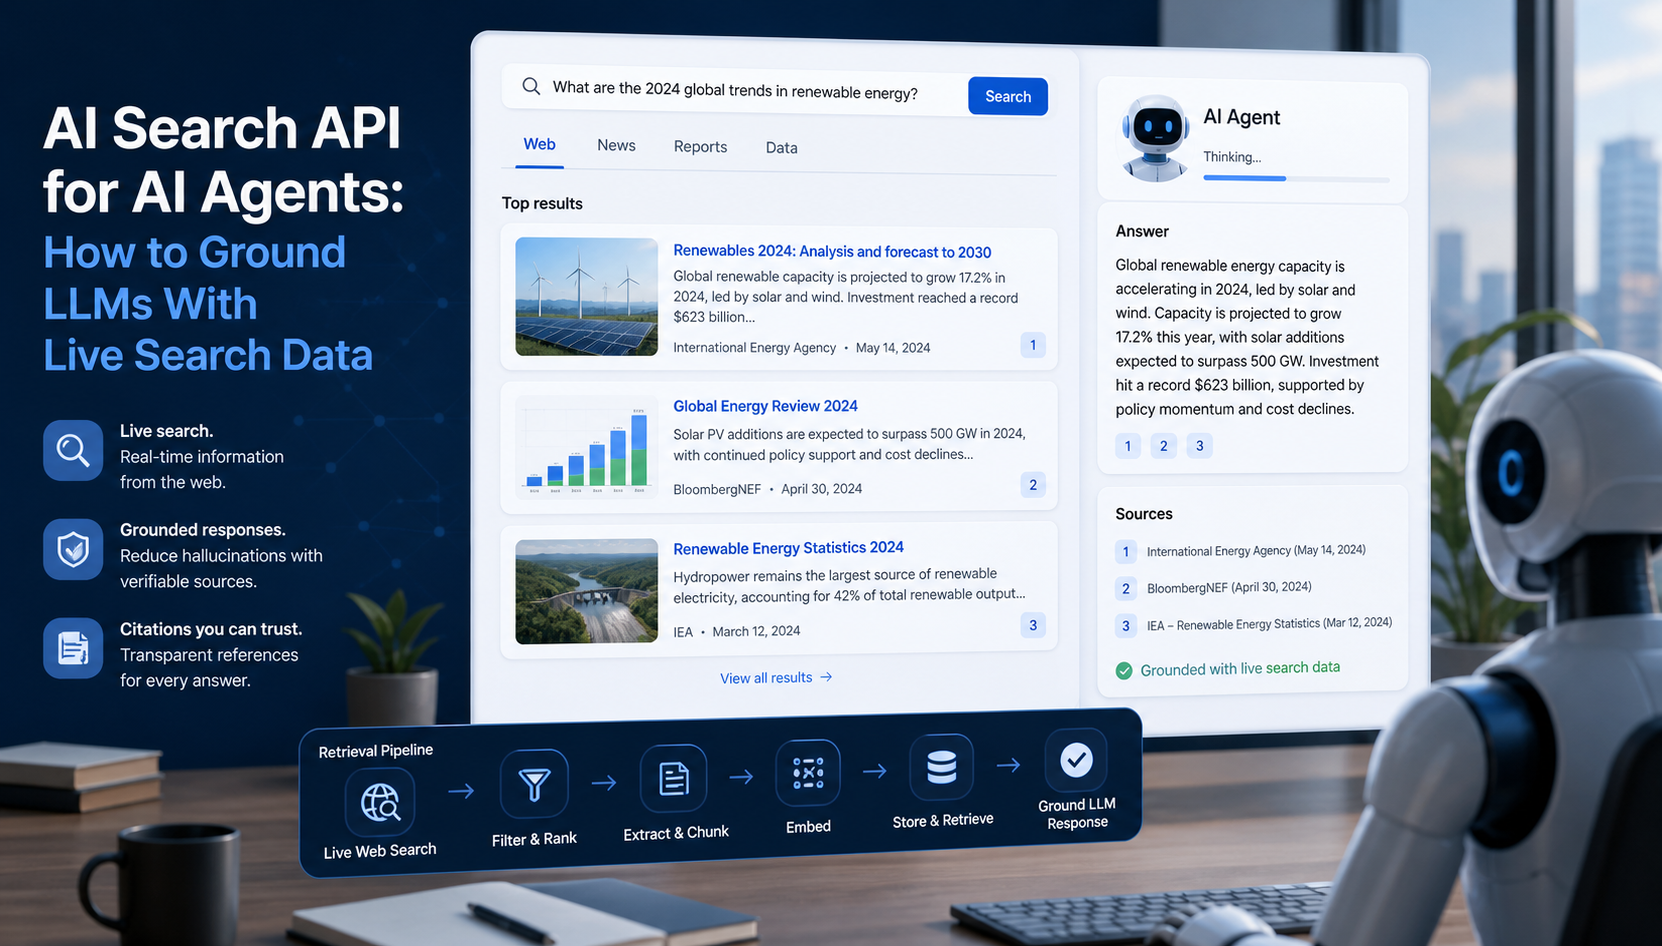
AI Search API for AI Agents: How to Ground LLMs With Live Search Data
An AI search API gives an application or agent programmatic access to current search results. Its most useful role is discovery: the agent can find candidate sources, identify fresh information, and decide what to retrieve next instead of relying only on model memory.
View Details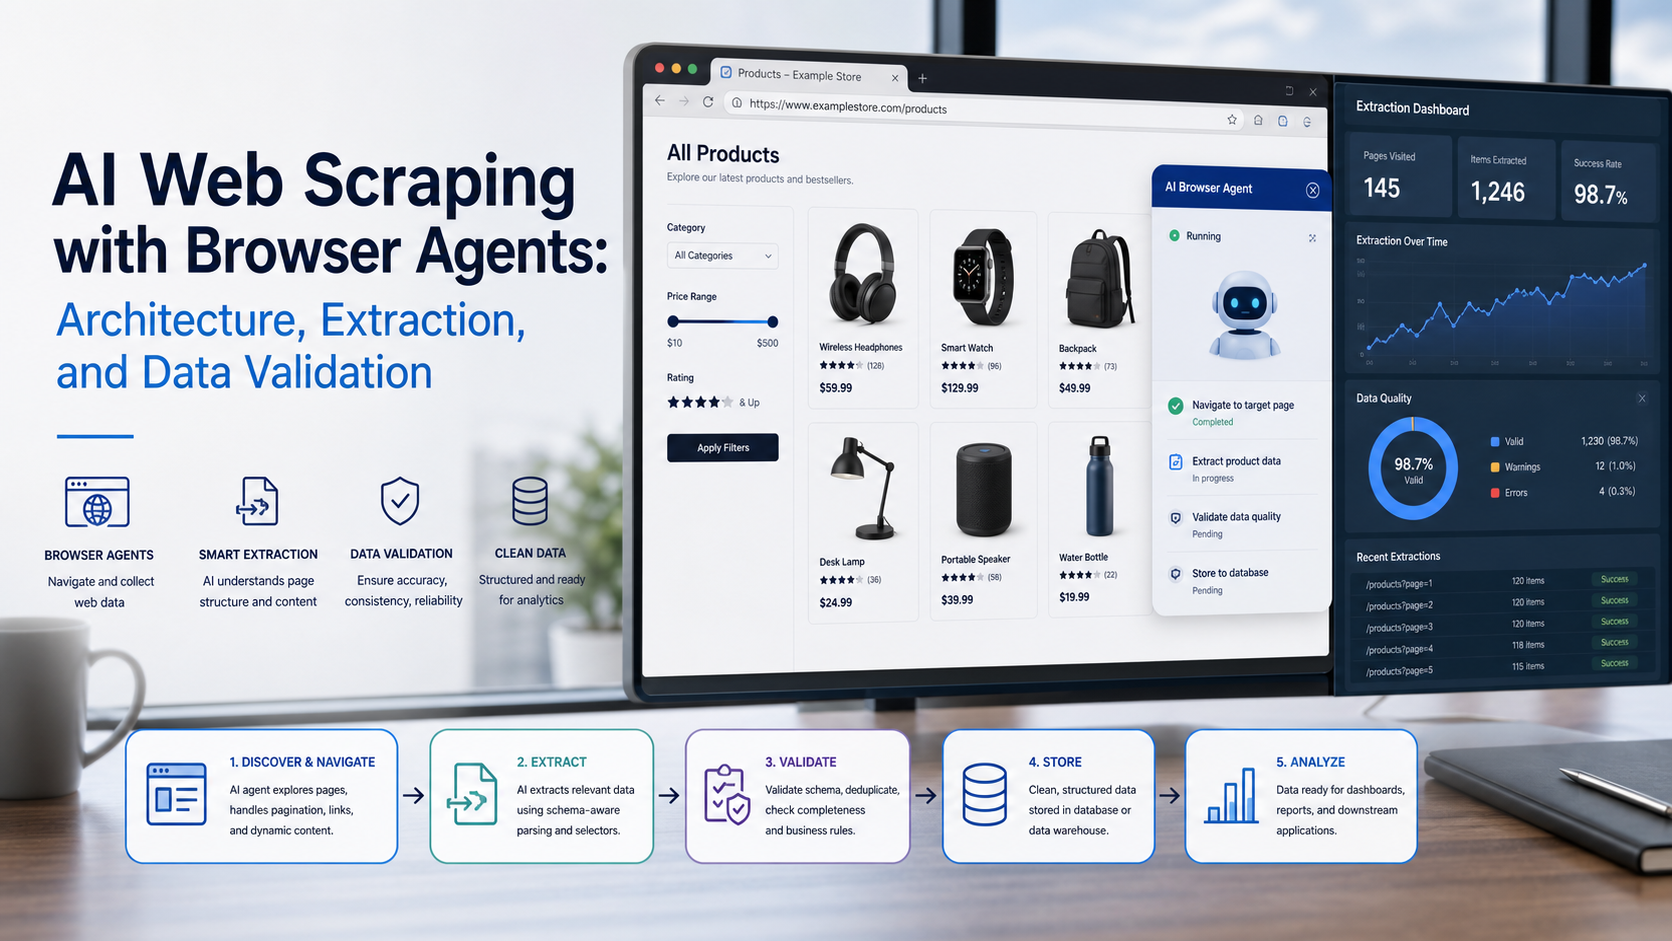
AI Web Scraping with Browser Agents: Architecture, Extraction, and Data Validation
AI web scraping uses AI to help discover, navigate, interpret, or extract information from websites. Browser agents are one implementation option when page interaction, rendering, or layout variation makes a simple scraper too brittle, but the agent should not become the entire data pipeline.
View Details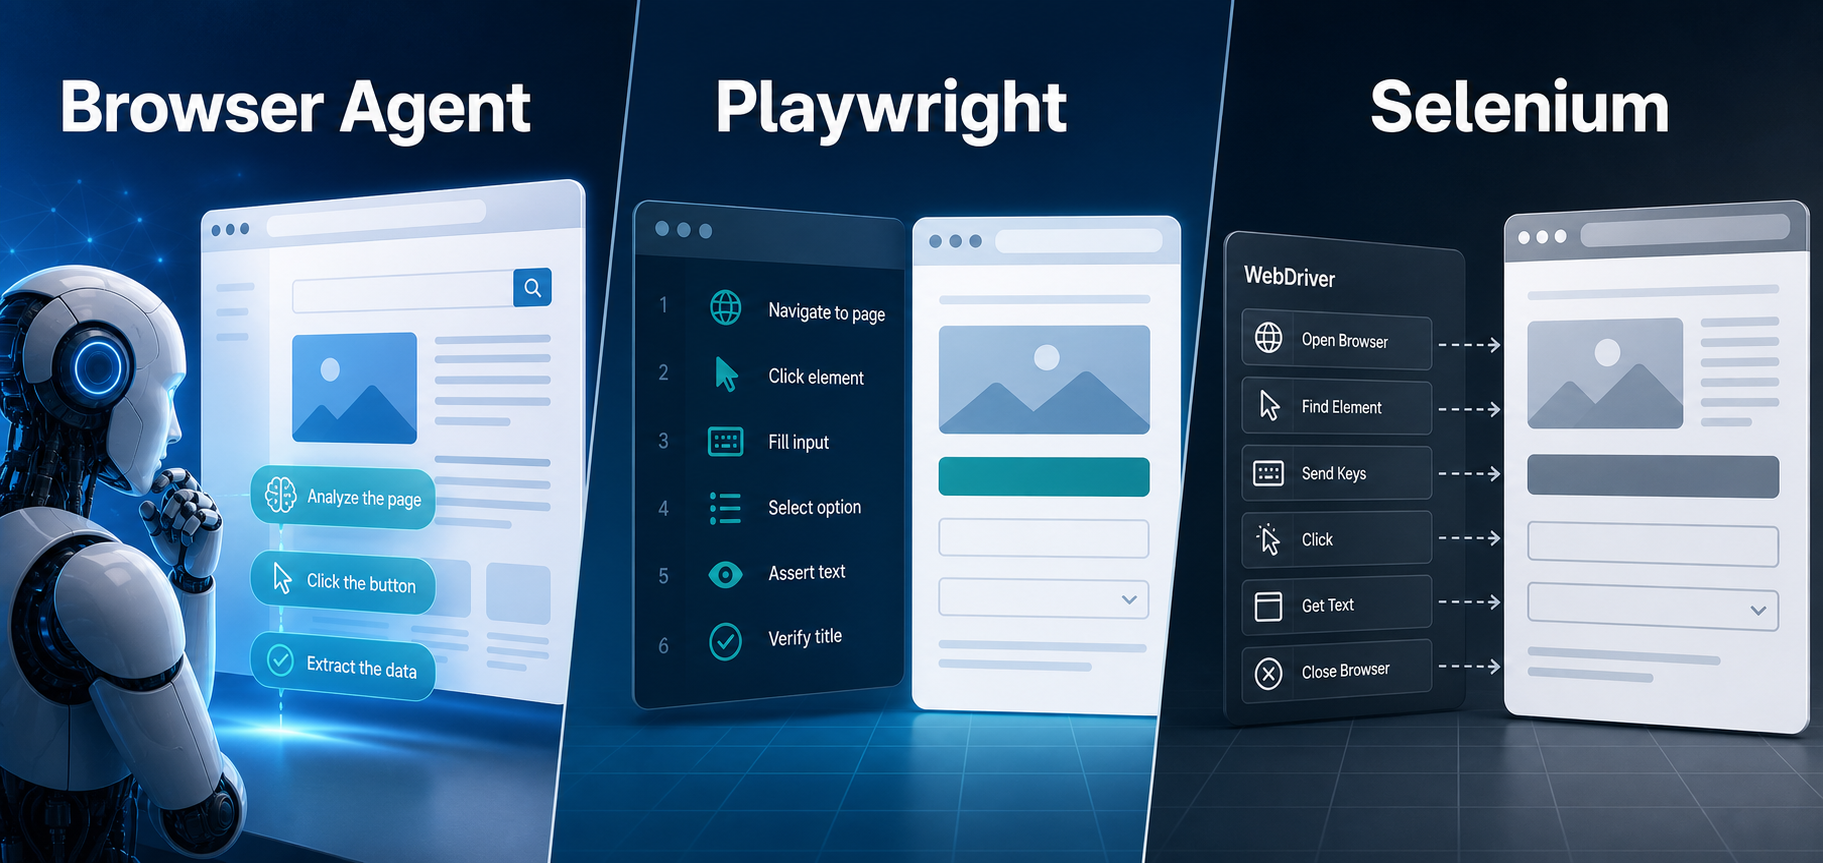
AI Browser Automation: Browser Agents vs Playwright vs Selenium
A browser agent interprets a goal and decides what browser action to take next. Playwright and Selenium can execute explicit, testable browser logic defined by developers. In 2026, however, Playwright also provides official MCP and agent-oriented workflows, so Playwright is no longer just the deterministic alternative to agentic automation. It can also serve as the browser-control layer inside an agent system.
View Details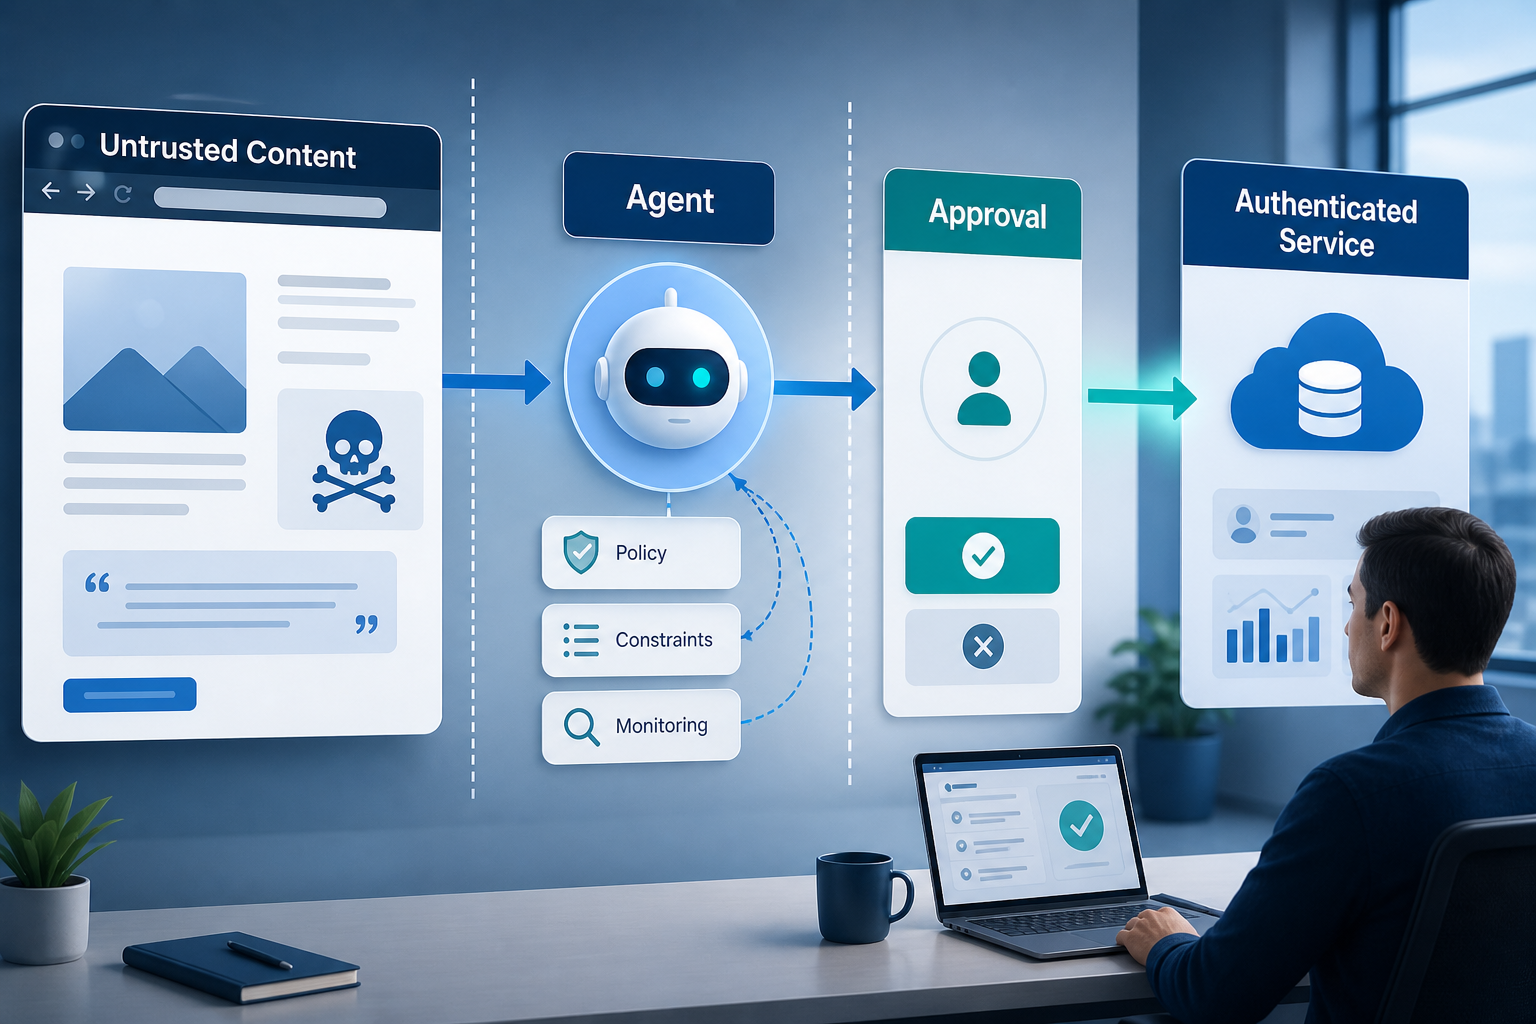
Agentic Browser Security: Prompt Injection, Permissions, and Safe Deployment
That combination creates risks that are different from ordinary browsing and traditional automation. The most important is indirect prompt injection, where hostile instructions hidden in web content attempt to redirect the agent away from the user's goal. Google describes indirect prompt injection as a primary new threat for agentic browsing and has introduced layered defenses that include origin constraints, independent action checks, threat detection, and user confirmation for sensitive actions. Google's Chrome security architecture is a useful reference for how browser-agent defenses are evolving.
View Details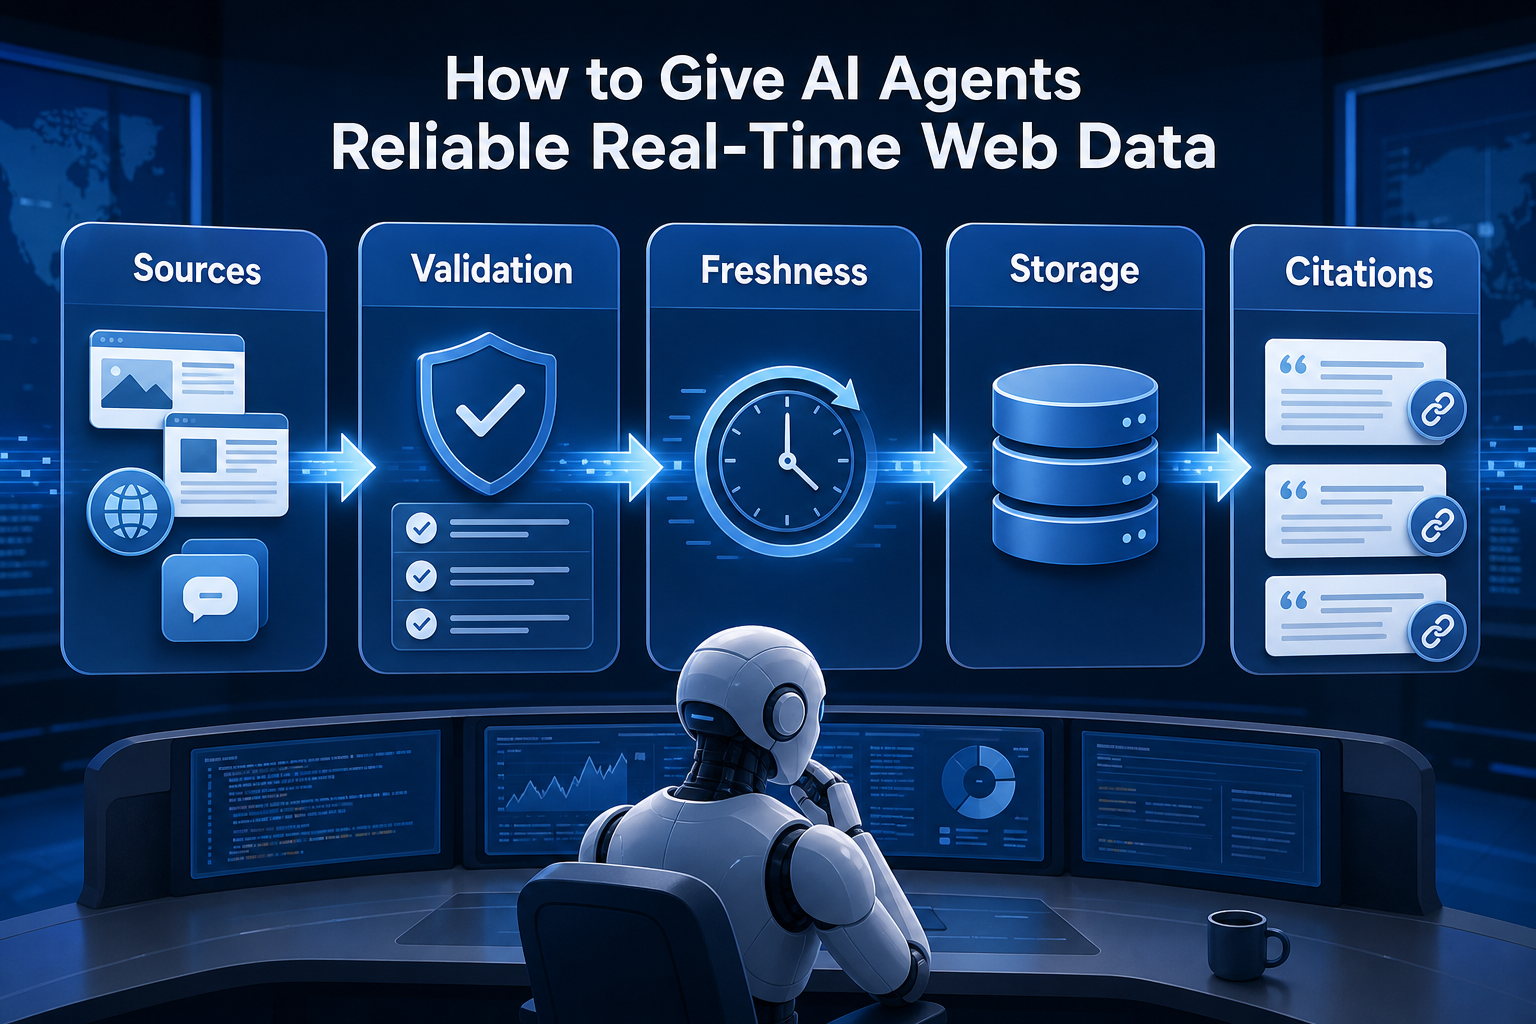
How to Give AI Agents Reliable Real-Time Web Data
A production-ready solution therefore needs more than a web scraper. It needs a web data layer that connects acquisition, validation, storage, retrieval, security, and observability. This guide explains how to design that layer.
View Details